
Full disclosure here. This blog post contains affiliate links. This simply means if you click on a link and decide to make a purchase, I get a small credit that helps support this blog. This does not affect the cost to you, it’s simply a referral fee. Your support is greatly appreciated!
Yes! You can paint a fiberglass shower surround. Yes! It will hold up.
We have lived in our home for almost 16 years! In fact, we are coming up on our 16th anniversary, Memorial Day weekend. Sadly, our master bathroom has been the forgotten room when it comes to home improvement projects. There was always something else that seemed to get pushed ahead of it. It’s been a patchwork of small projects over the years. New (inexpensive) flooring, painting the wall, vanity, and trim. Adding some storage, but never anything significant. It’s still the same builder grade bathroom it was when the house was built.
When we moved in, there was carpet in the bathroom! WHY? Why, did builders put carpet in the bathrooms in the early ’90s? I will NEVER understand putting carpet in the bathroom. Needless to say, this was the FIRST thing to go. At the time, vinyl flooring that looked like wood was brand new on the mark. We thought we were really installing something cutting edge. Truthfully, at the time, it was. We picked a faux wood vinyl plank that was peel and stick. At that time you really only had two choices; peel and stick faux wood planks or sheet vinyl that looked like wood. Fast forward 16 years, I HATE it! Did I mention I hate it? It’s warped, the seems are pulling apart, the wood “picture” is wearing off, and certain areas are starting to pull up. As my neighbor once said, “I think it has come here to do all it came to do”.
About a year ago, I had decided I was over this forgotten bathroom, and it was high time we overhauled it. Well, this was a fantastic idea until I realized my choice of decor did not match our budget. Pinterest and Instagram can really get a girl in trouble. The dreams get poured on pretty thick! Retiling a shower ourselves scares me. It’s messing with water! If it’s done incorrectly, a much larger mess could be created. So I knew, if we wanted it retiles, we would need to hire someone. After hearing what a friend of mine paid to have her shower retiled (which was half the size of ours) that confirmed I needed to come up with an alternate plan. Replacing our shower with tile wasn’t an option. I knew at the end of the day; we would probably be able to invest no more than a $1000 total for the entire bathroom. The reality is, renovating this bathroom would be stretched over time as the budget allowed. I began contemplating painting the shower! So I had several ideas and then consulted with my brother. He is the VP at Summit Paint Center in Barberton, OH. I knew if products existed to make this crazy idea of my come to fruition, he would know. I assumed it would need to be an oil-based primer and paint, but which one, that’s where I needed some help. The key for this to be successful is entirely in the prep work and the products you use. The old saying “you get what you pay for” really does hold true here.
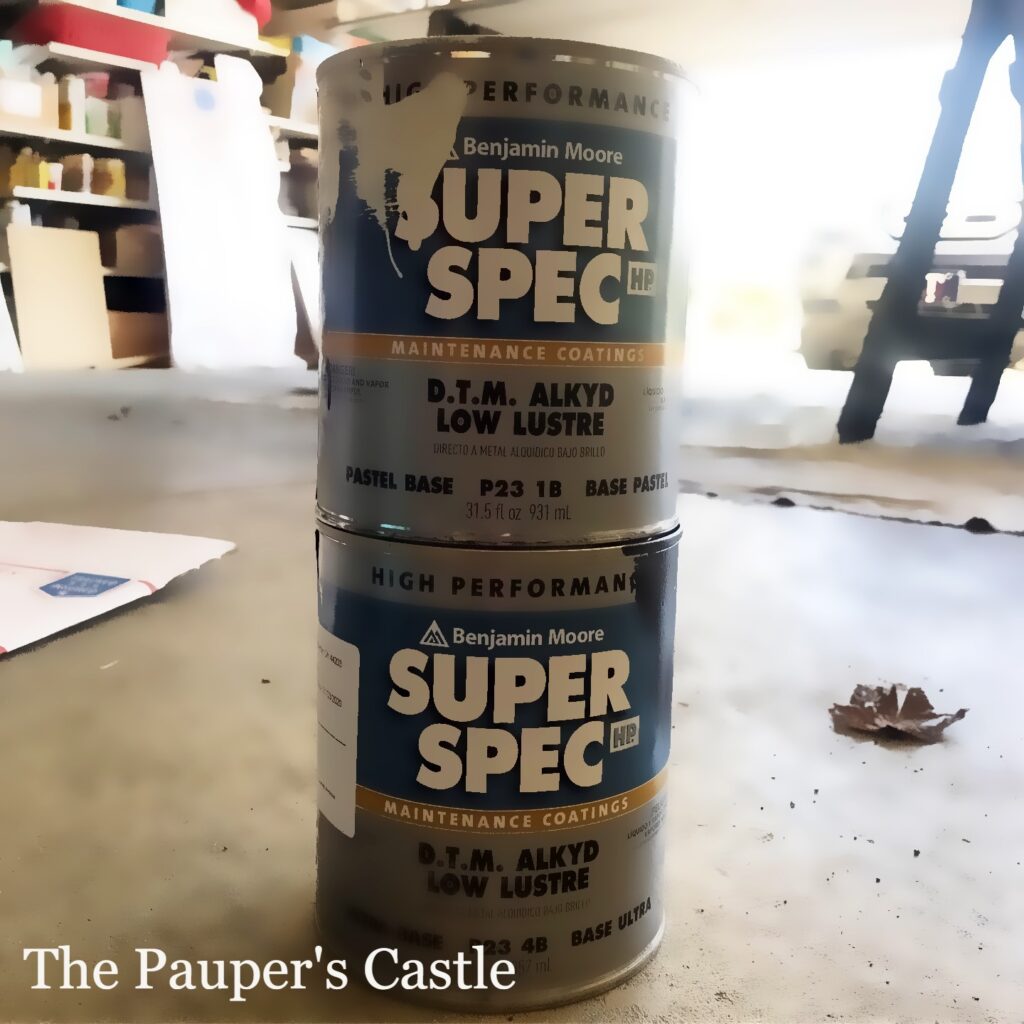
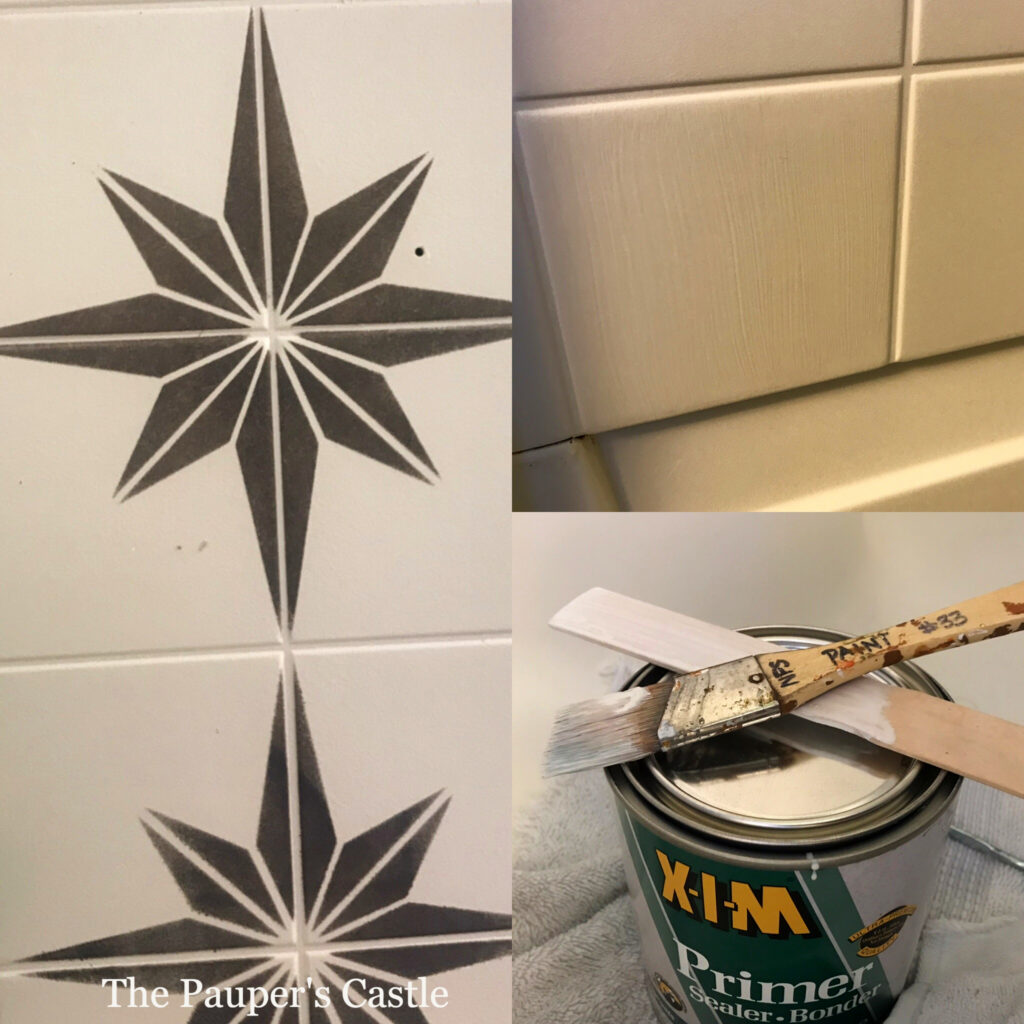
My brother suggested using Rust-oleum X-I-M Primer Sealer Bonder for the primer. For paint, he suggested Benjamin Moore Super Spec HP in low luster. I had the white tinted to a color that was as close to a match as I could get to the white of the shower enclosure. I had no plans of painting the shower pan, so I wanted something that looked like it matched. I had the black tinted to BM Mopboard Black. About 2-3 months before I started this project, I did a test run on a single “tile” in the shower. I wanted to be sure it would hold up to daily showers and cleaning. I cleaned and sanded my test “tile.” Painted the primer following the manufacturer’s instructions and then put two coats of the white BM paint over the primer and let it dry for about 16 hours before we used the shower again. I chose an area that would be less noticeable if it didn’t work, but one that still got very wet. Almost three months later, no issues at all! So, I was confident it was safe to move forward with my project. Plus, the weather had finally warmed up enough that I could open the window to ventilate the bathroom.
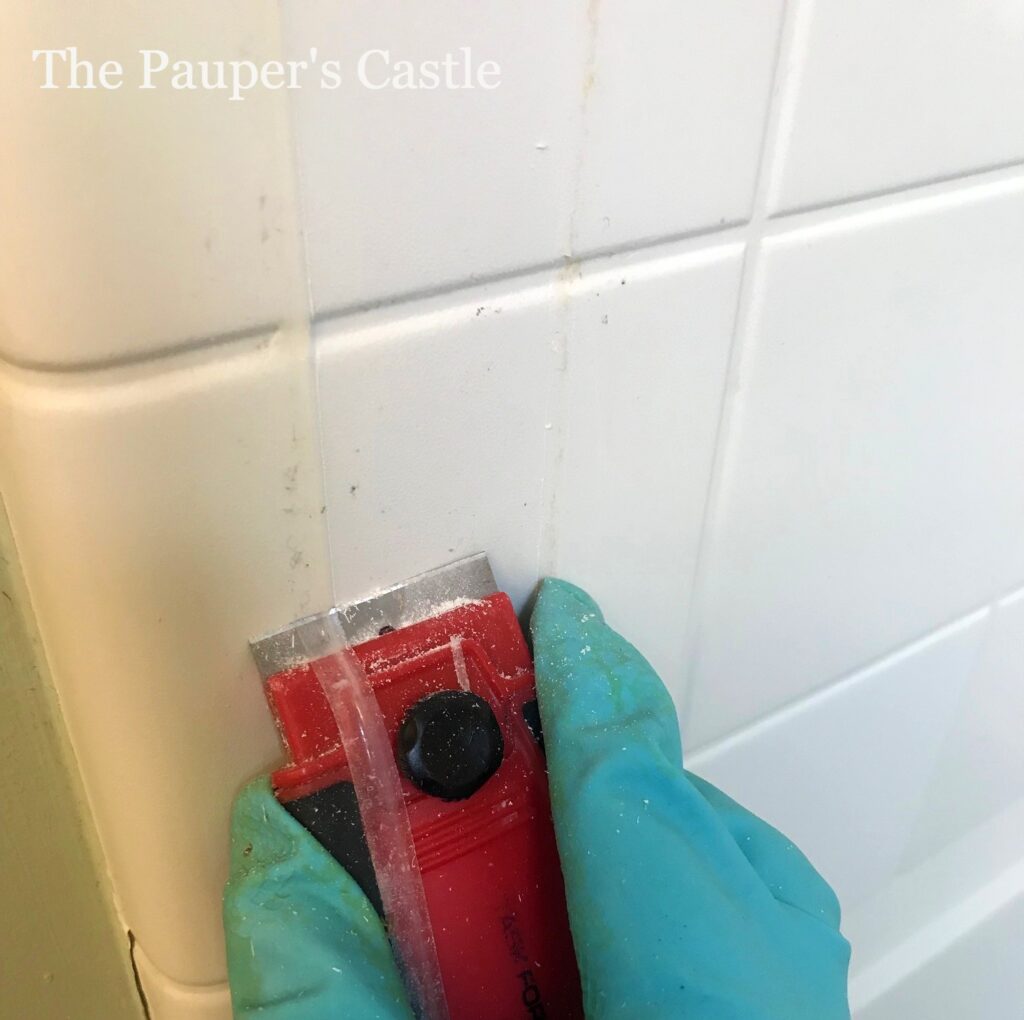
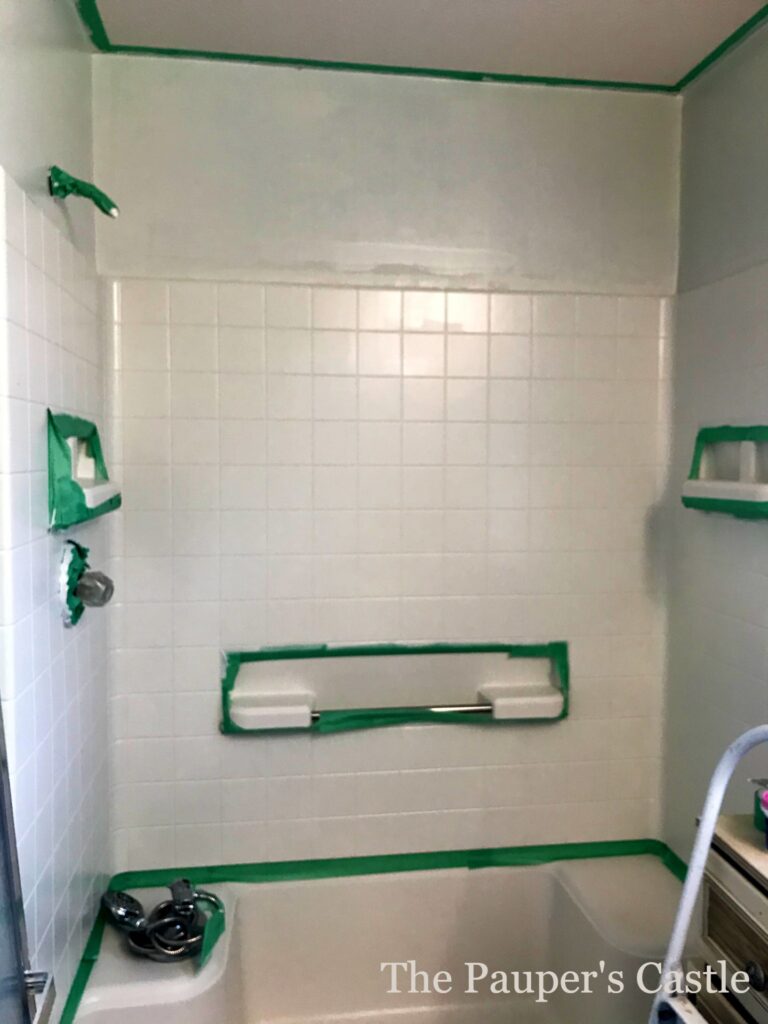
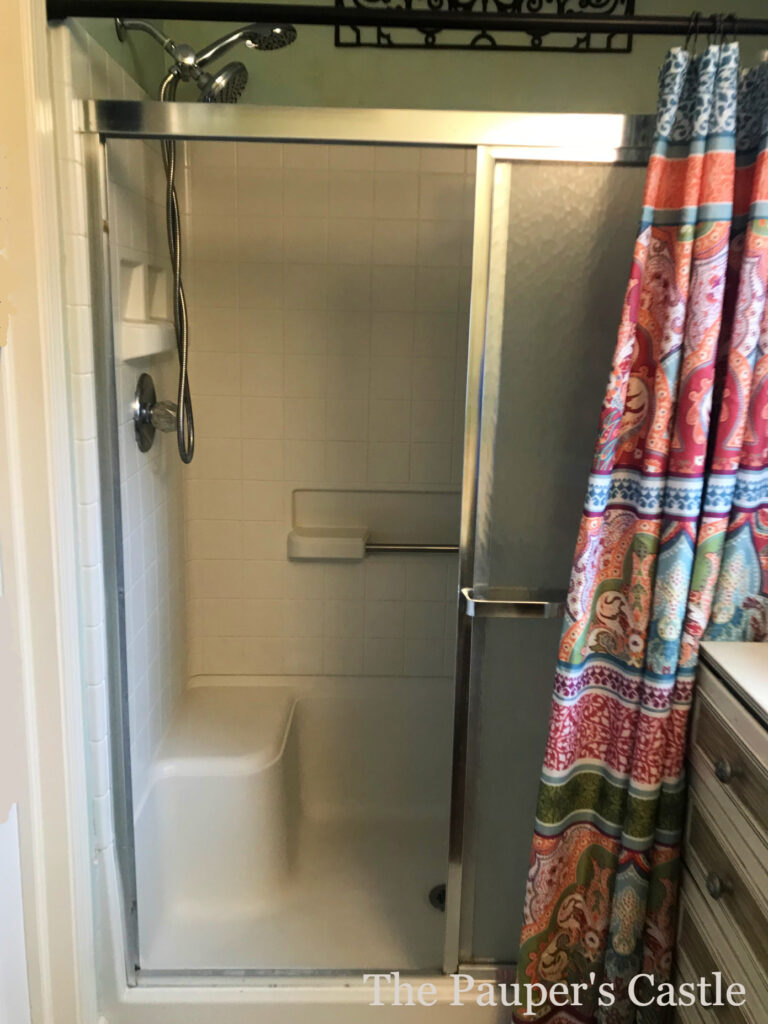
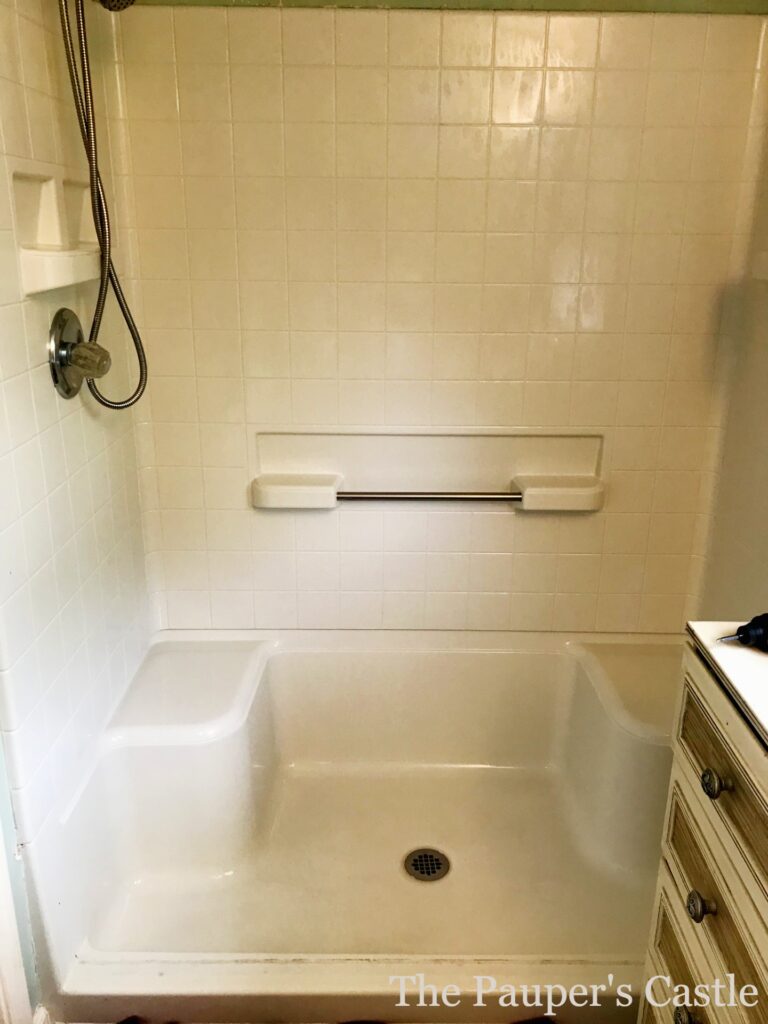
Your first step is to THOROUGHLY CLEAN your shower. We removed the shower doors and tracks completely. I had plans for painting these later vs replacing them! That will be a whole separate post! I will spare you on gross factors, but it’s amazing how much gunk collects under a shower track over the course of 30 years. If I’d know how easy the shower tracks would come out, I would have removed them years ago and cleaned. I used a widget and a putty knife to remove ALL silicone caulk from where the shower door tracks were. This is EXTREMELY important. Any silicone caulk left behind and the primer and paint WILL NOT stick. After scrapping the caulk, I scrubbed the shower walls with TSP and a magic eraser, three of them actually. So buy the big pack! Rinsed the shower with water, scrubbed it again with a fresh bucket of TSP, and a magic eraser. Rinsed again. Then sanded with 120 grit sandpaper, paying special attention to the areas that had caulk to make sure if there was any left behind it was removed with the sanding. I did use a random orbit sander in this process. You could do it with a sanding block, but your arm will be tired! Then I did a final rinse with water. I did all of this BEFORE I primed the walls. I then taped off the ceiling and all the cubbies. I did NOT paint the cubbies or the shower pan. These areas tend to need more cleaning than the walls so I wanted to be able to really scrub these areas if need with no worry of scratching or chipping paint. However, my test “tile” held up just fine to the TSP, magic eraser, and the random orbit sander. Very promising for the future of the shower.
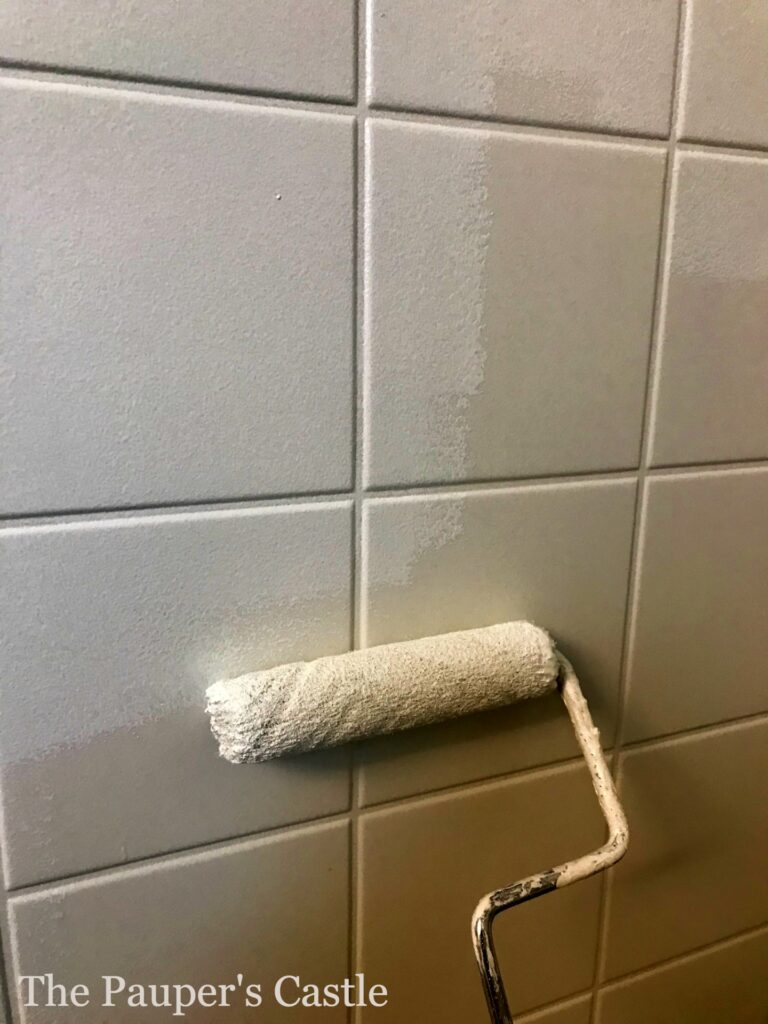
On to priming! When I say ventilate the bathroom, I mean it! You will NEED a respirator mask for this project! Don’t do what I did and attempt to do this during a COVID-19 pandemic where respirator masks are nowhere to be found. The primer smells AWFUL! It is so strong! I wore TWO homemade masks, had the exhaust fan in our bathroom on, plus the window open with a fan, so it was blowing out the window, hoping to mitigate the fumes. I had to take several breaks and found myself at one point with my head out the window in our bedroom, just trying to breathe in fresh oxygen. Don’t do this without proper equipment. You have been warned! The paint was smelly but not NEAR as bad as the primer. I wore a single homemade mask with the paint, and I was fine. Of course, I still had the fan in the window, and the exhaust fan was going, and if I had a respirator mask, I would have worn it for this part too. Ha! I think I may have killed a few brain cells during priming and painting!
I applied one coat of primer and two coats of white paint, following the manufacturer’s instructions for dry time between coats on primer and paint. I cleaned, primed, and painted the shower in one weekend.
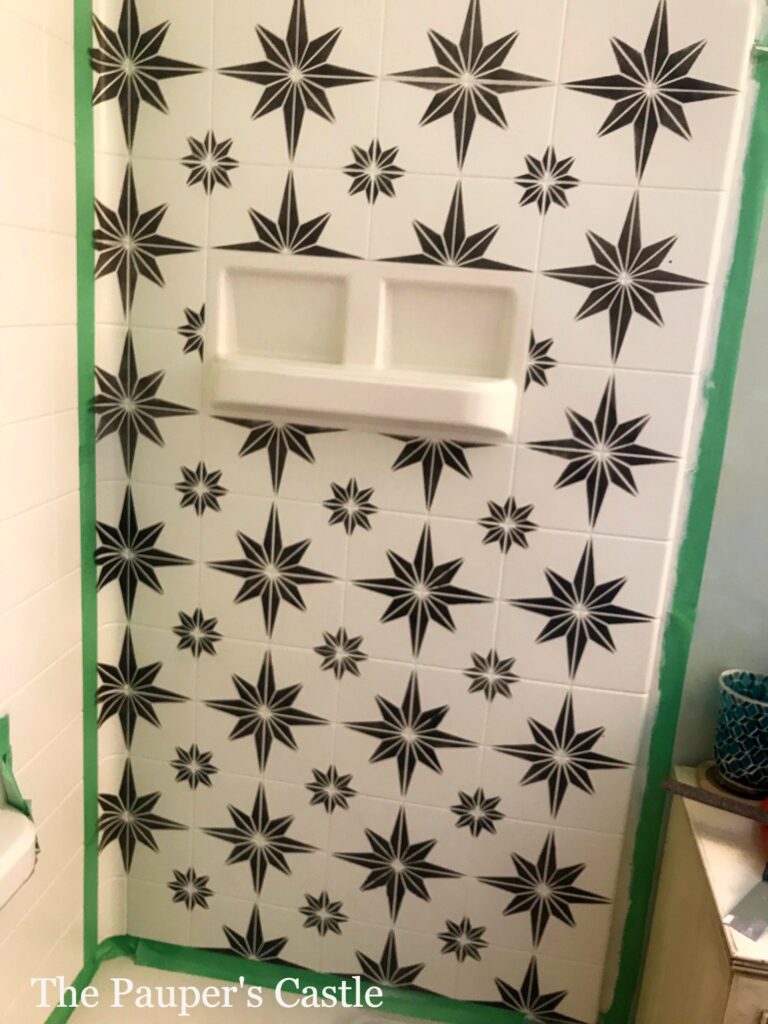
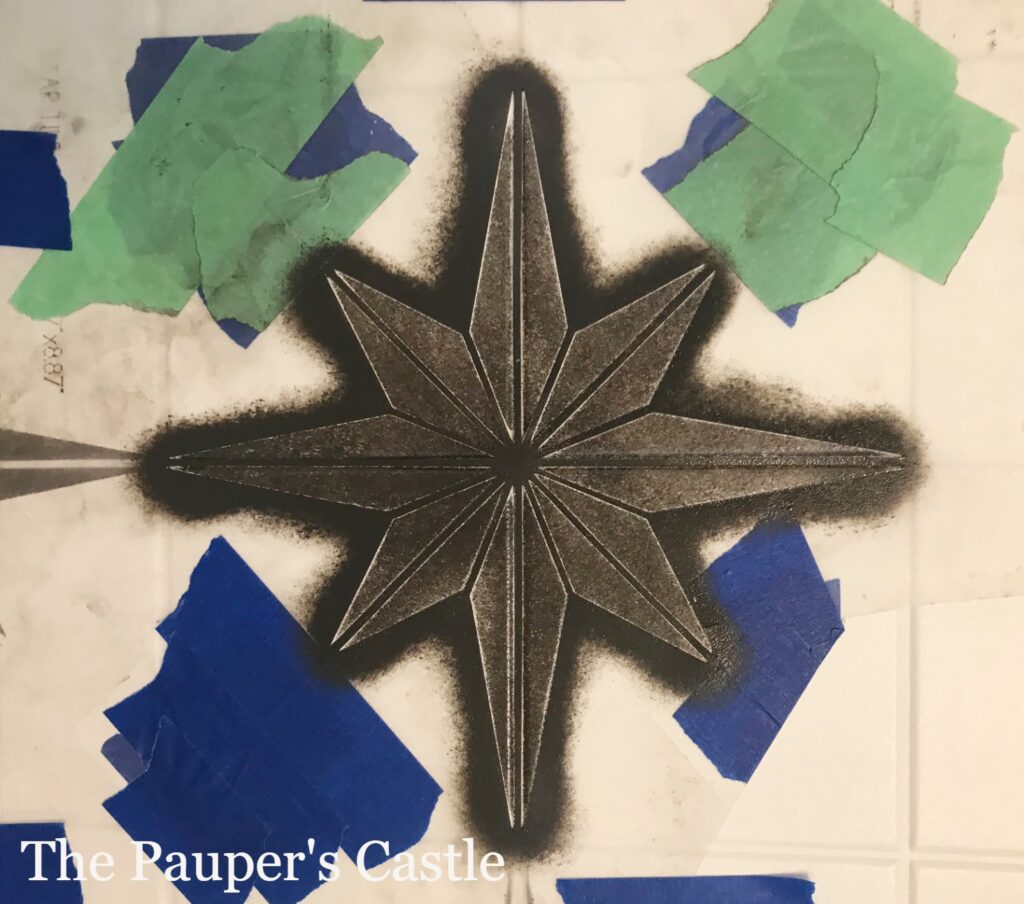
The following weekend I started the stencil process. This entire stenciling process would take me two full weekends. I purchased my stencil from Cutting Edge Stencils. It’s called Star Tile Design. I loved this one because it wasn’t too busy. I could still have the overall pattern, but I was afraid with the more intricate design, it might be overwhelming in a small space. Erica at Cutting Edge Stencils was AWESOME to work with. She worked with me to get the exact size I needed. I wanted four of my “tiles” (the faux tile in the shower surround) to create one “tile” from the stencil. We exchanged several emails, and then I placed my custom order! Erika recommended that I order two stencils, and I am thrilled I did! I had one I was able to cut up for small hard to work around areas and one that was still intact. I highly recommend checking out their videos on how to stencil if you have questions or are uncertain of the process. I’m not going to explain this process, because they have perfected it. Check them out, watch their videos, and follow their instructions.
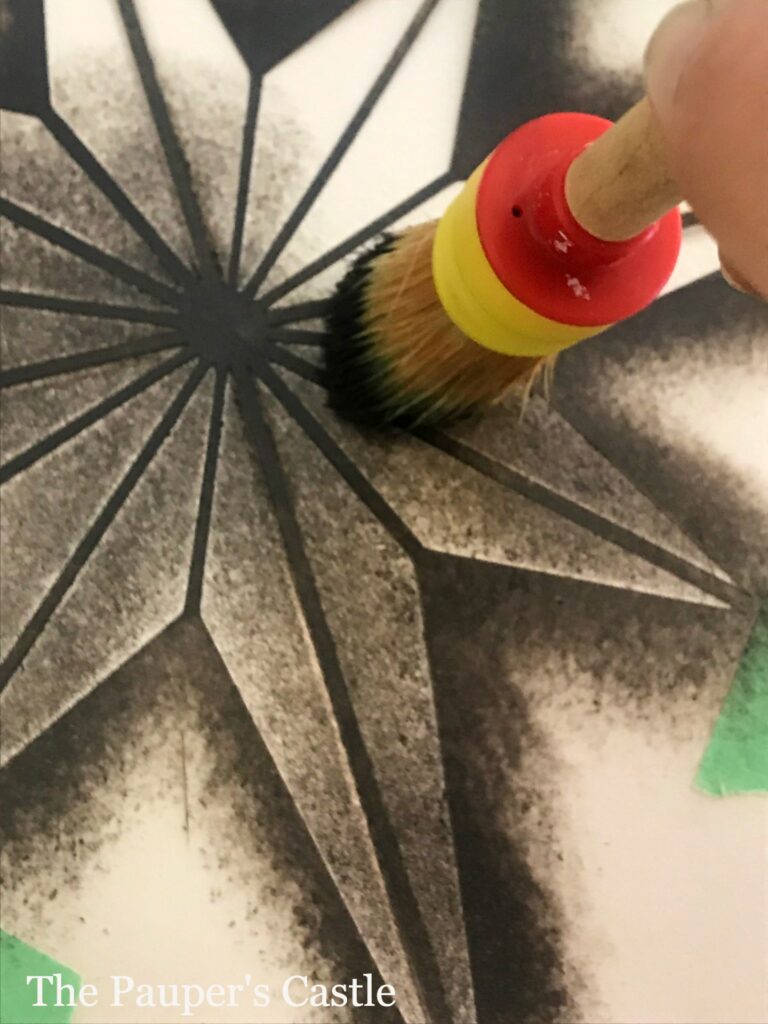
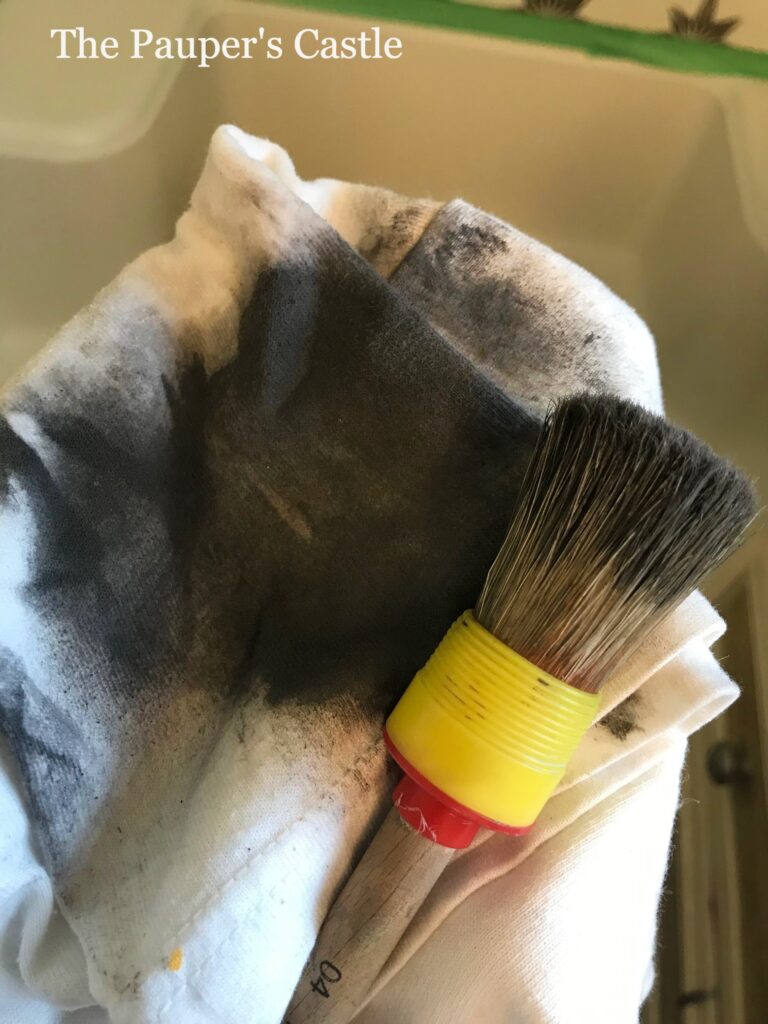
I will tell you upfront; Cutting Edge Stencils say NOT to use oil-based paint. I am sure this made the process more difficult, but because it’s the shower, and it will endure moisture and lots of temperature changes, I would highly recommend using oil-based paint. This is just my opinion! Cutting Edge Stencils also recommends using a high-density foam roller. I DID NOT have good luck with the roller. I quickly switched to a stencil brush. For me, this worked better. I felt like I had more control over the amount of paint that I was applying and a lot less bleeding under the stencil.
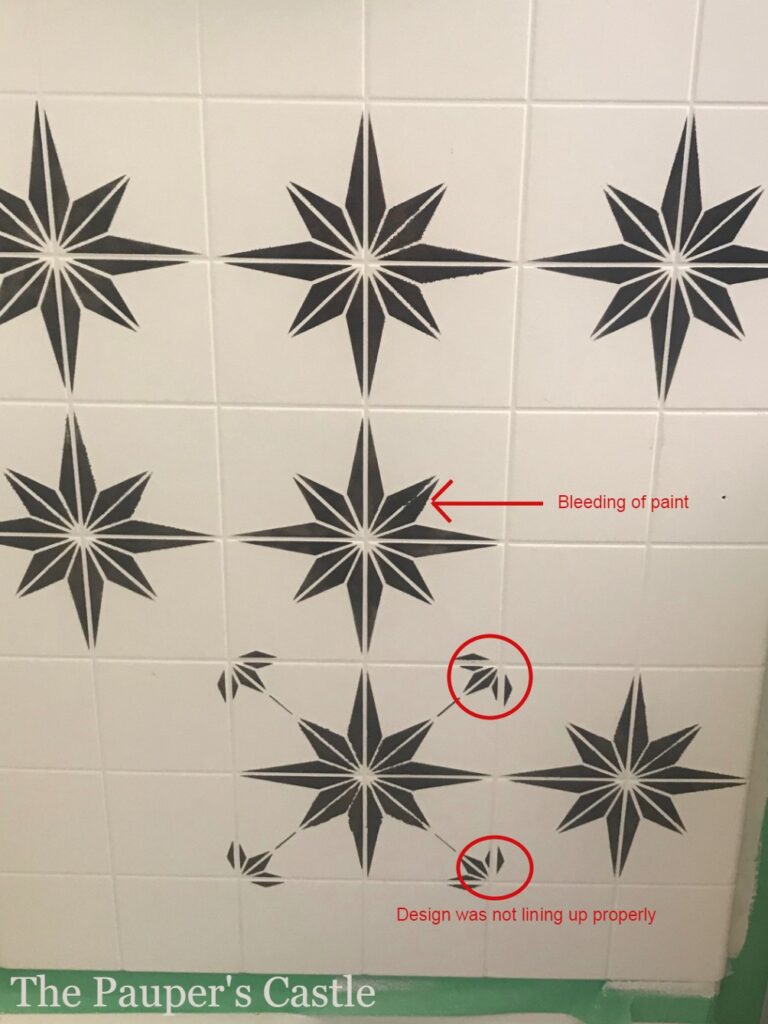
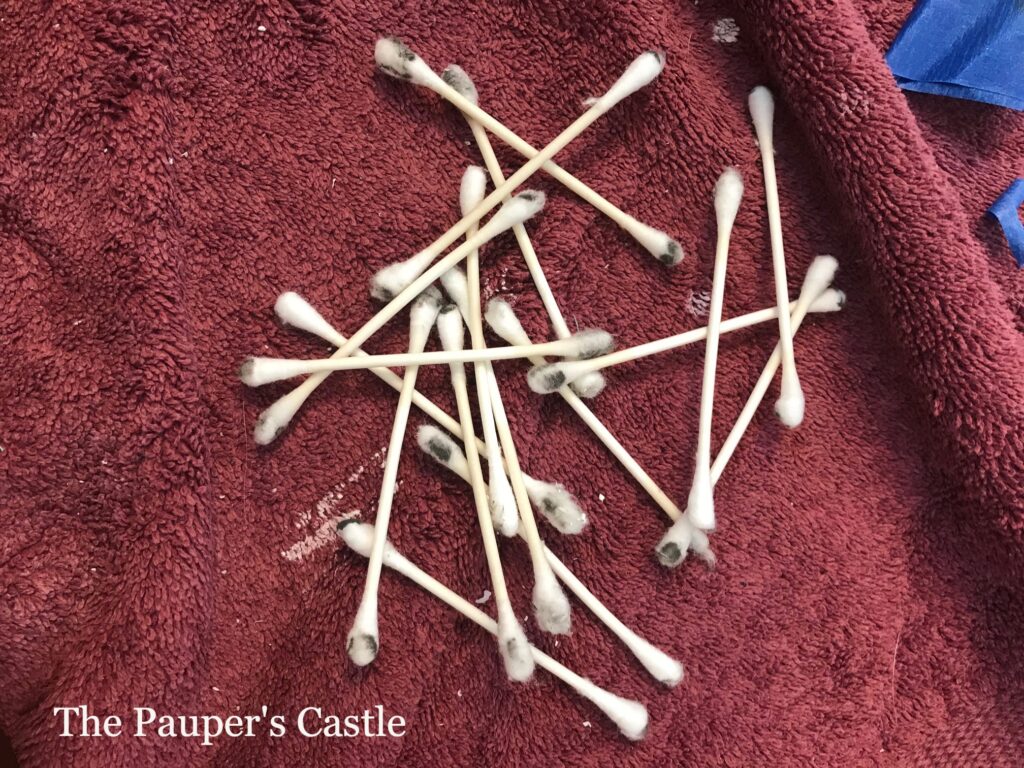
Left: close-up of the first attempt with the roller. I was also having issues lining the stencil up with the faux grout lines in the shower. I cleaned up the bleeds with Q-Tips and mineral spirits. I also removed the lines that I taped off in the right picture the same way.
Right: I ended up taping off the lines between the large star and the small star. In the end, I didn’t miss the extra line detail on the stencil at all.

One of the biggest challenges of working with oil-based paint was the dry time for stenciling. I didn’t think about that when I started this project. I had a small panic moment about how I was going to make this work. After consulting with my brother, he recommended a product called Japan Drier. This product is not easy to find. They carry it at Summit Paint Center, but they are in Ohio, and I am in Indiana. Not an option for a quick pick-up. I usually plan my projects when I know I’m going to see my brother. However, this time, I was left to a google search, which resulted in several options, but most were order online and have it delivered. We have a Rocker Wood Working here in Indy, which said they had it in stock but call to confirm. I got lucky, they had it one in stock, but you can get it shipped if needed. It took one capful for the quart of paint. Sadly, I paid $10 for one capful; this was about equal to 1 tsp. I guess I have plenty for future projects! The good news, it did speed the dry time and allowed the oil-based paint to work for stenciling. It was still sticky, but dry enough, I could put the stencil over it, and it not transfer.
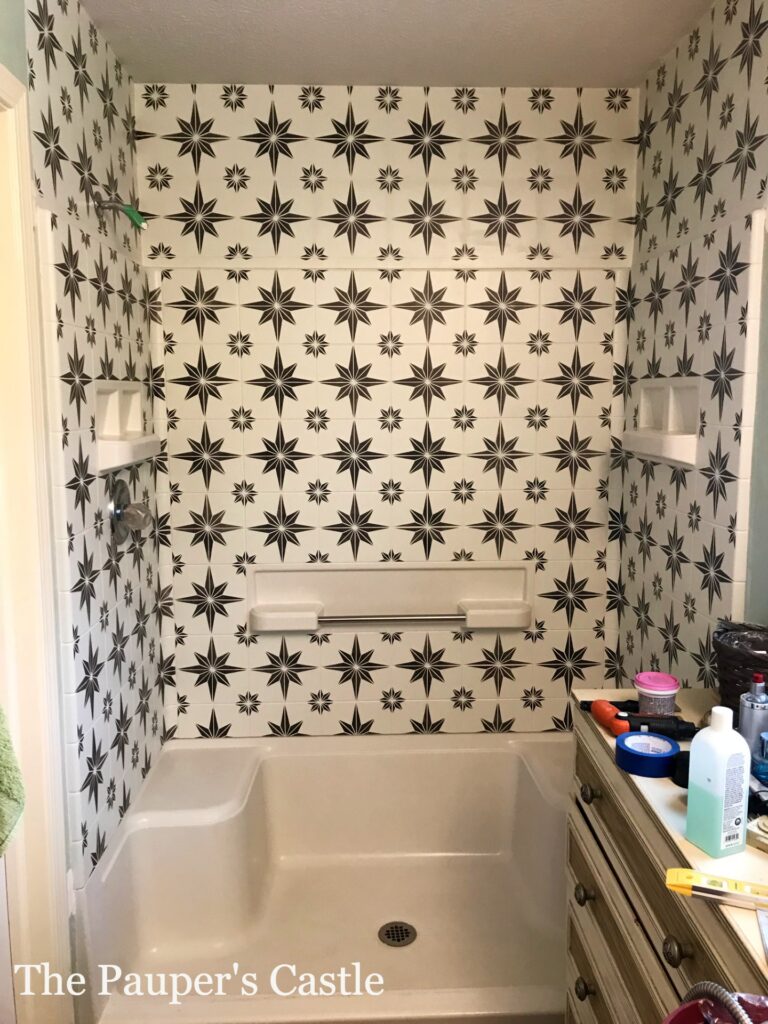
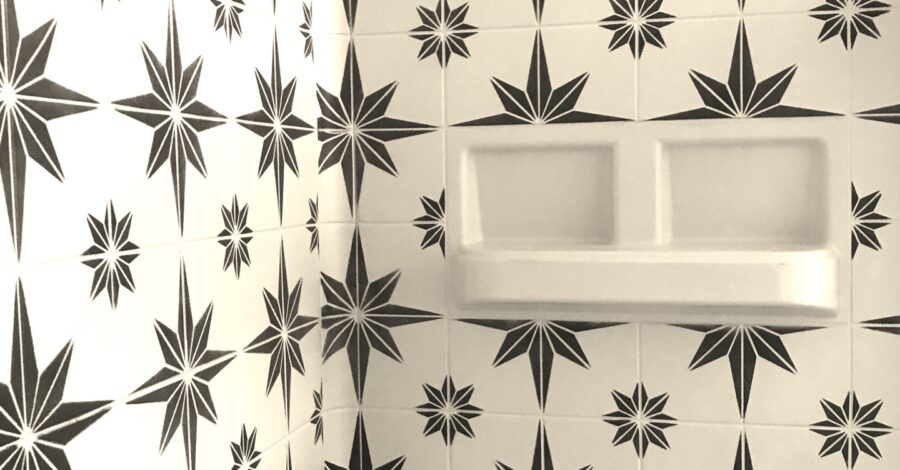
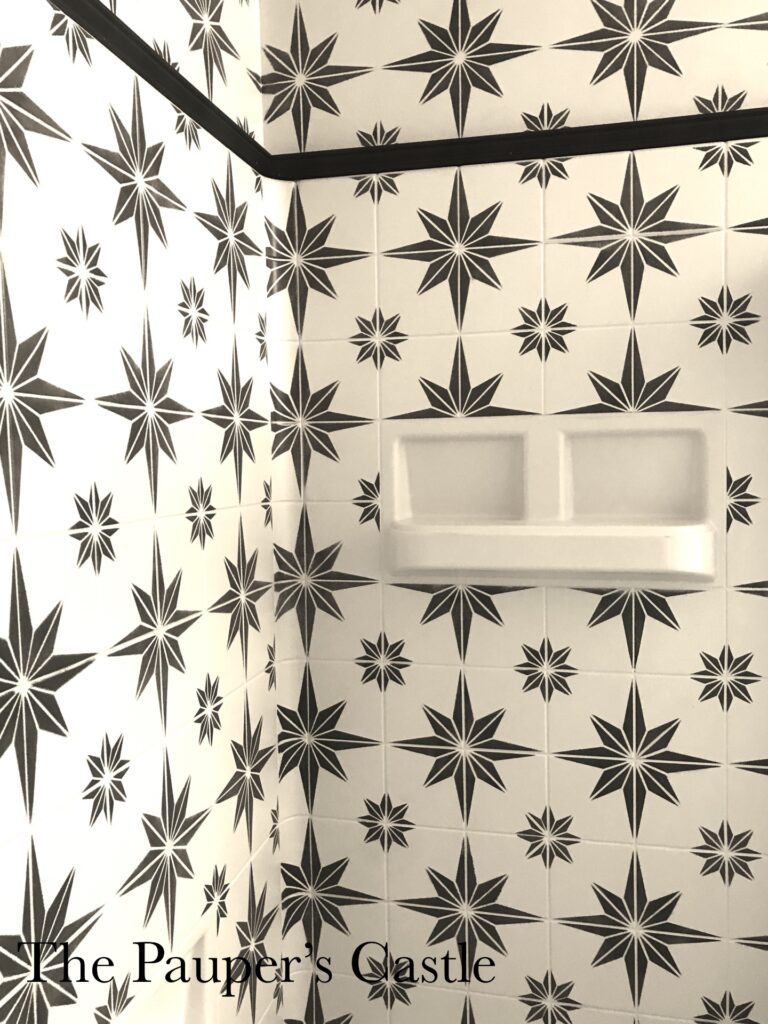
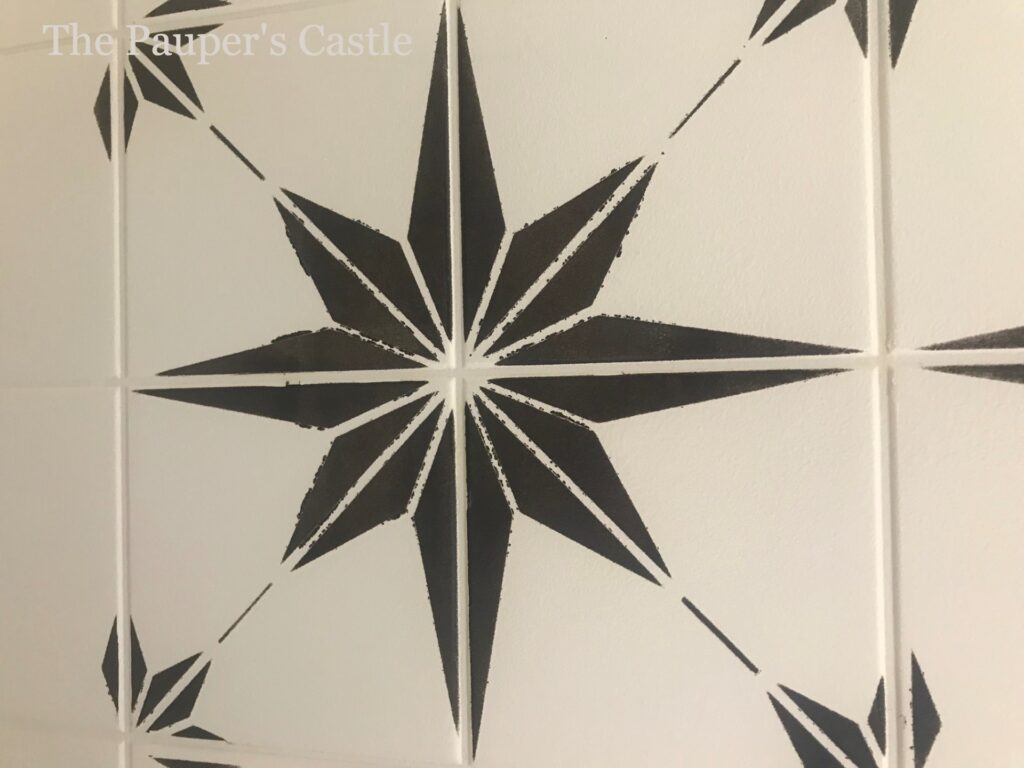
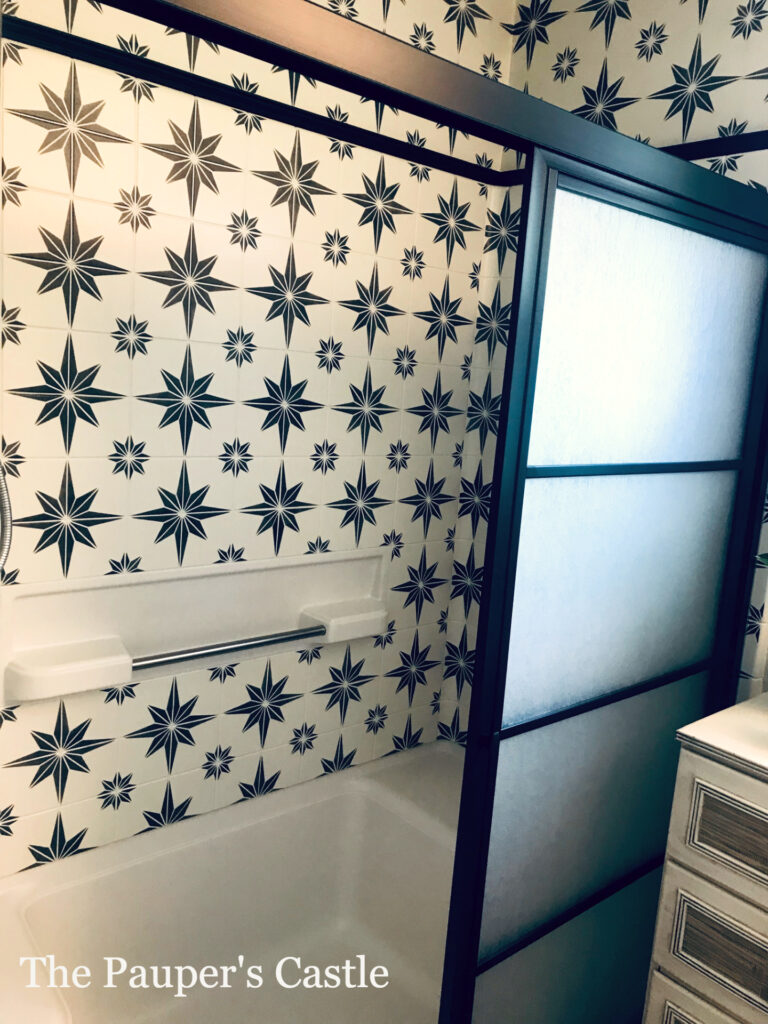
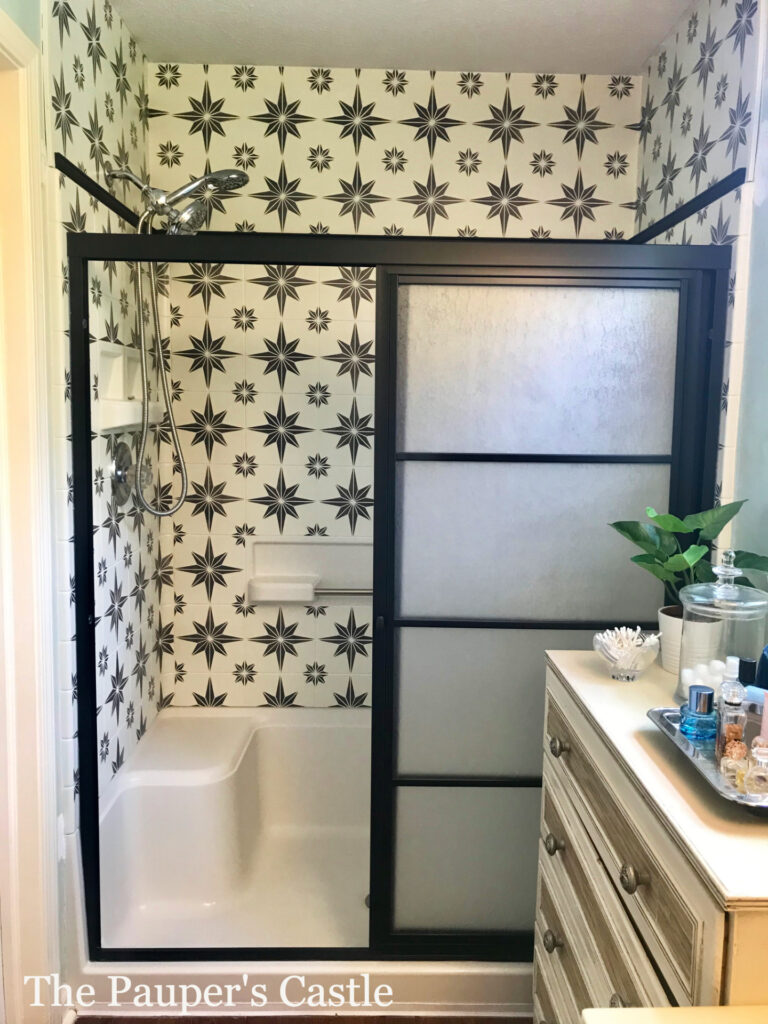
As mentioned earlier, the stenciling took me two FULL weekends to complete. I did carry the stencil onto the wall above the shower surround. I felt this gave a more realistic tile look. When I started planning this project out, I felt like the shower would need a transition between the enclosure and the actual wall. I envisioned a boarder tile and decided to use a decorative trim piece to do this. If I had it to do over, I would have simply moved the stencil down, so it picked up off the surround and continued up the wall. After the stenciling was complete, it was tough to tell where the surround ended and the wall began. Unfortunately, I had already stenciled the design, and I wasn’t painting over it and starting again. So, we moved forward with the original plan and added the trim. In the end, I think it still looks great!
The final step was to seal the shower walls. I had NOT planned initially to do this. My brother and I both thought since I used oil-based paint, there would not be a need to seal it. However, because the black was on SO thin if you scrubbed, it did come off. It took some elbow grease, but it still would come off. I just spent three full weekends painting, the last thing I wanted to be was for it to come off when I cleaned! Because I had used oil-based paint, I had to be sure to use a clear coat that was compatible with oil-based. I knew if I used an oil-based poly, it would yellow the white paint.
Here are the final results! I am over the moon the way this DIY project turned out. I spent less than $300 for the entire shower renovation, doors included! No demolition was required, and I saved at a minimum of $2000. Our shower surround had faux tile, but this process could just as easily be done on a smooth shower surrond. In some ways, I think the smooth surround would be easier. Is it tile? No! But…until we can afford to have this replaced with real tile, I’m going to enjoy this and the money we saved. For less than $300, I think it was a fantastic update, and we love it!

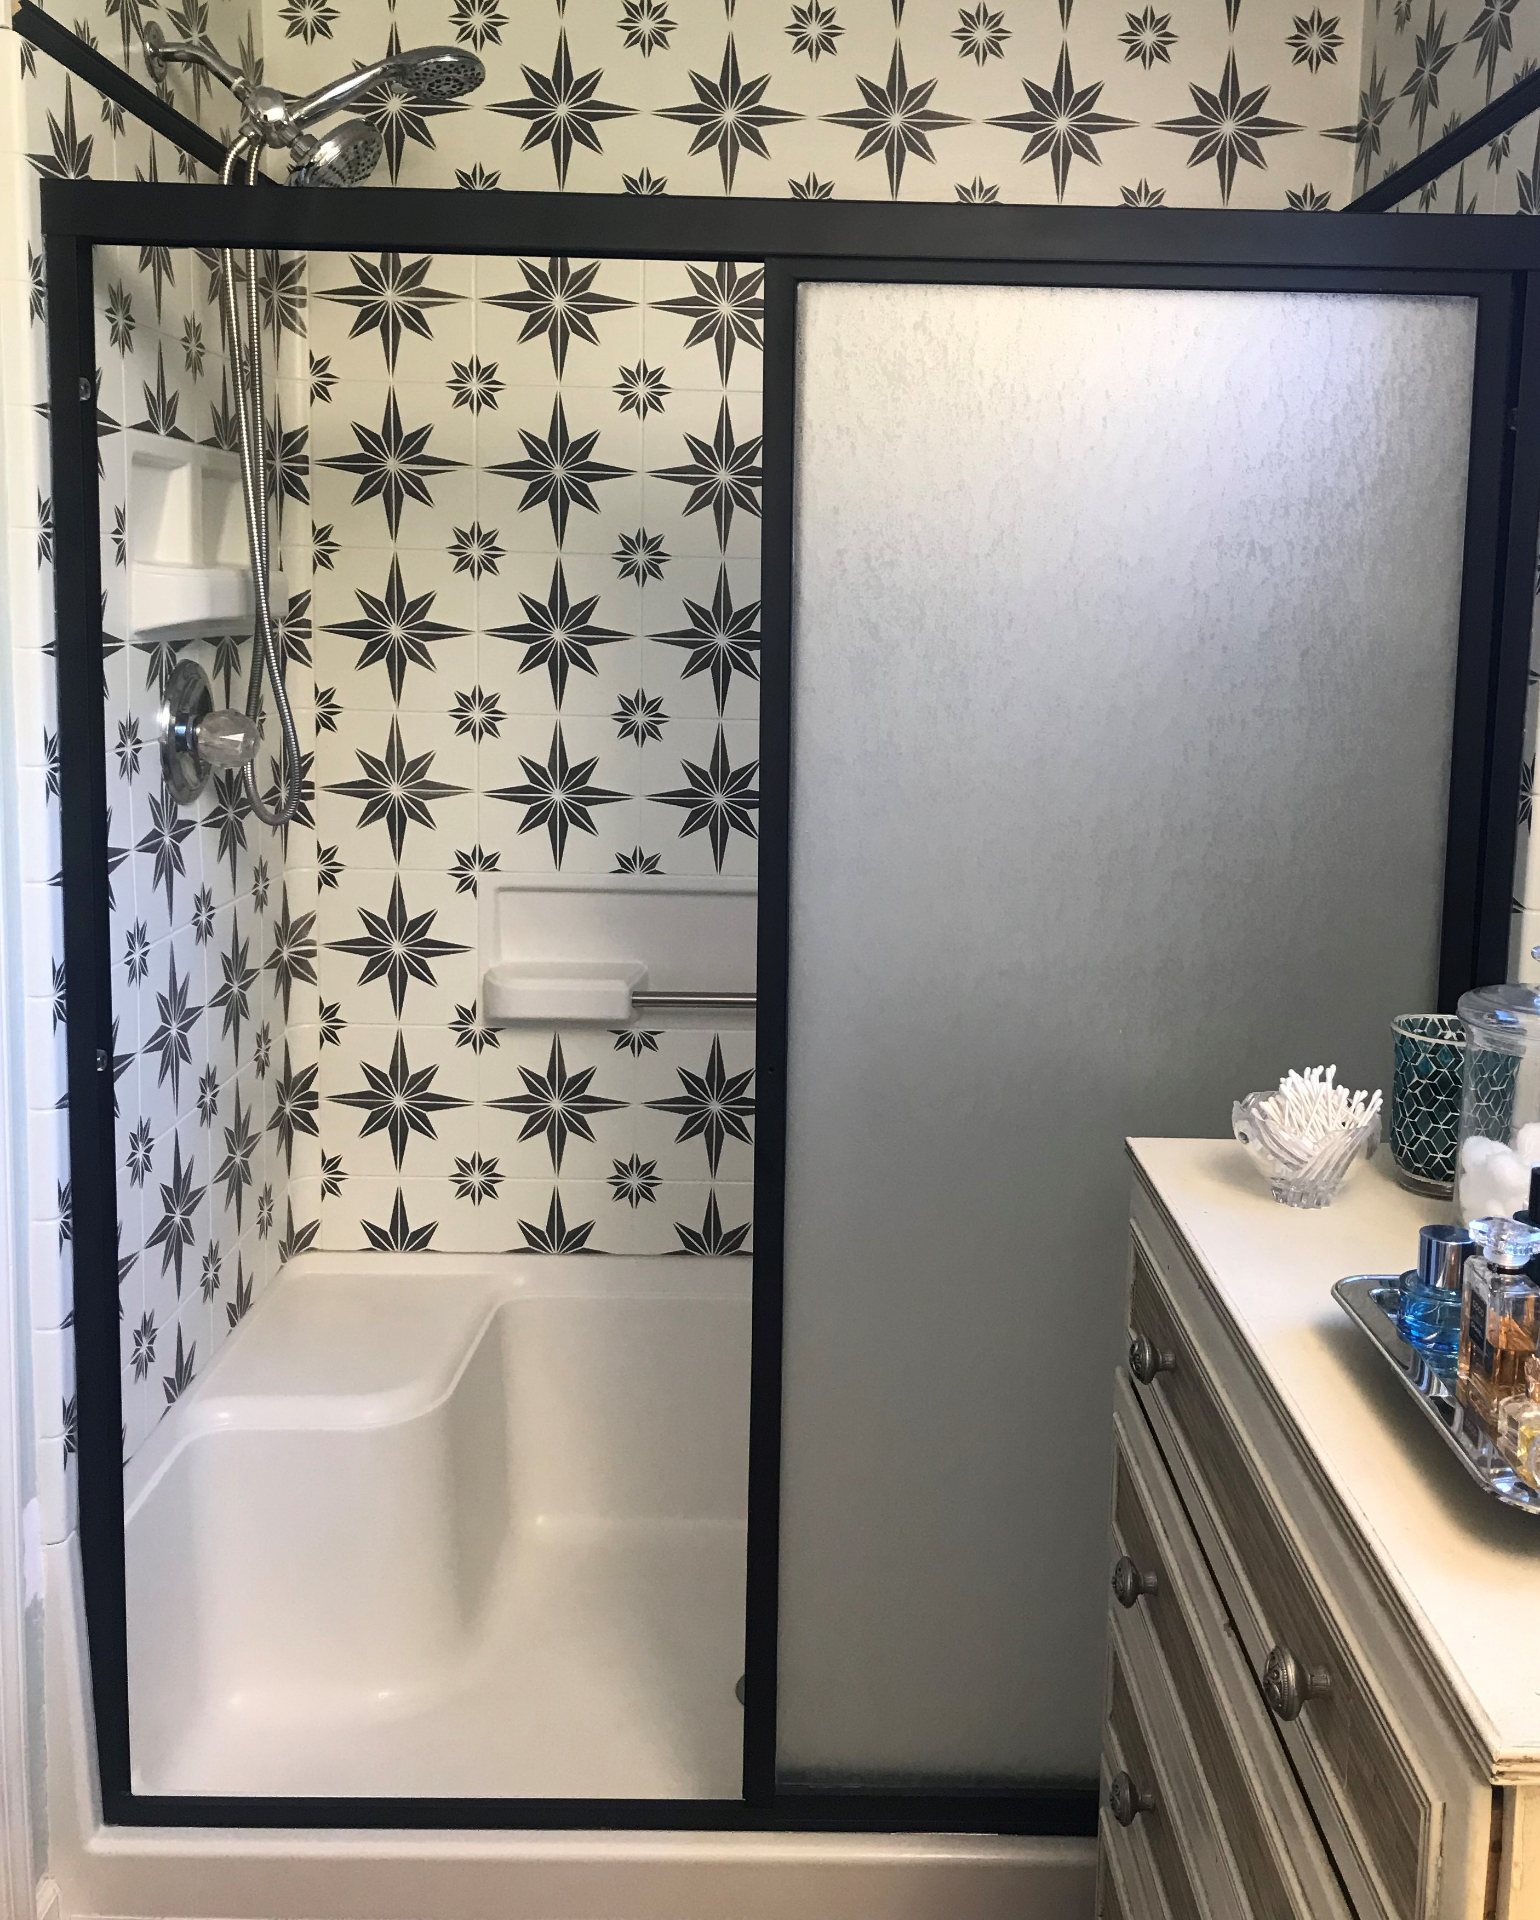 After
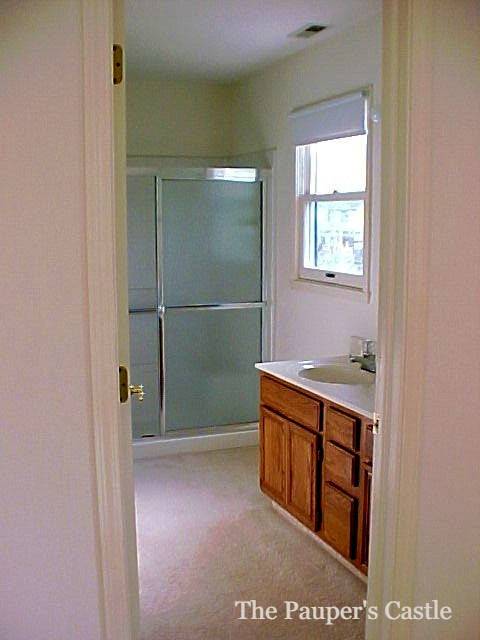
After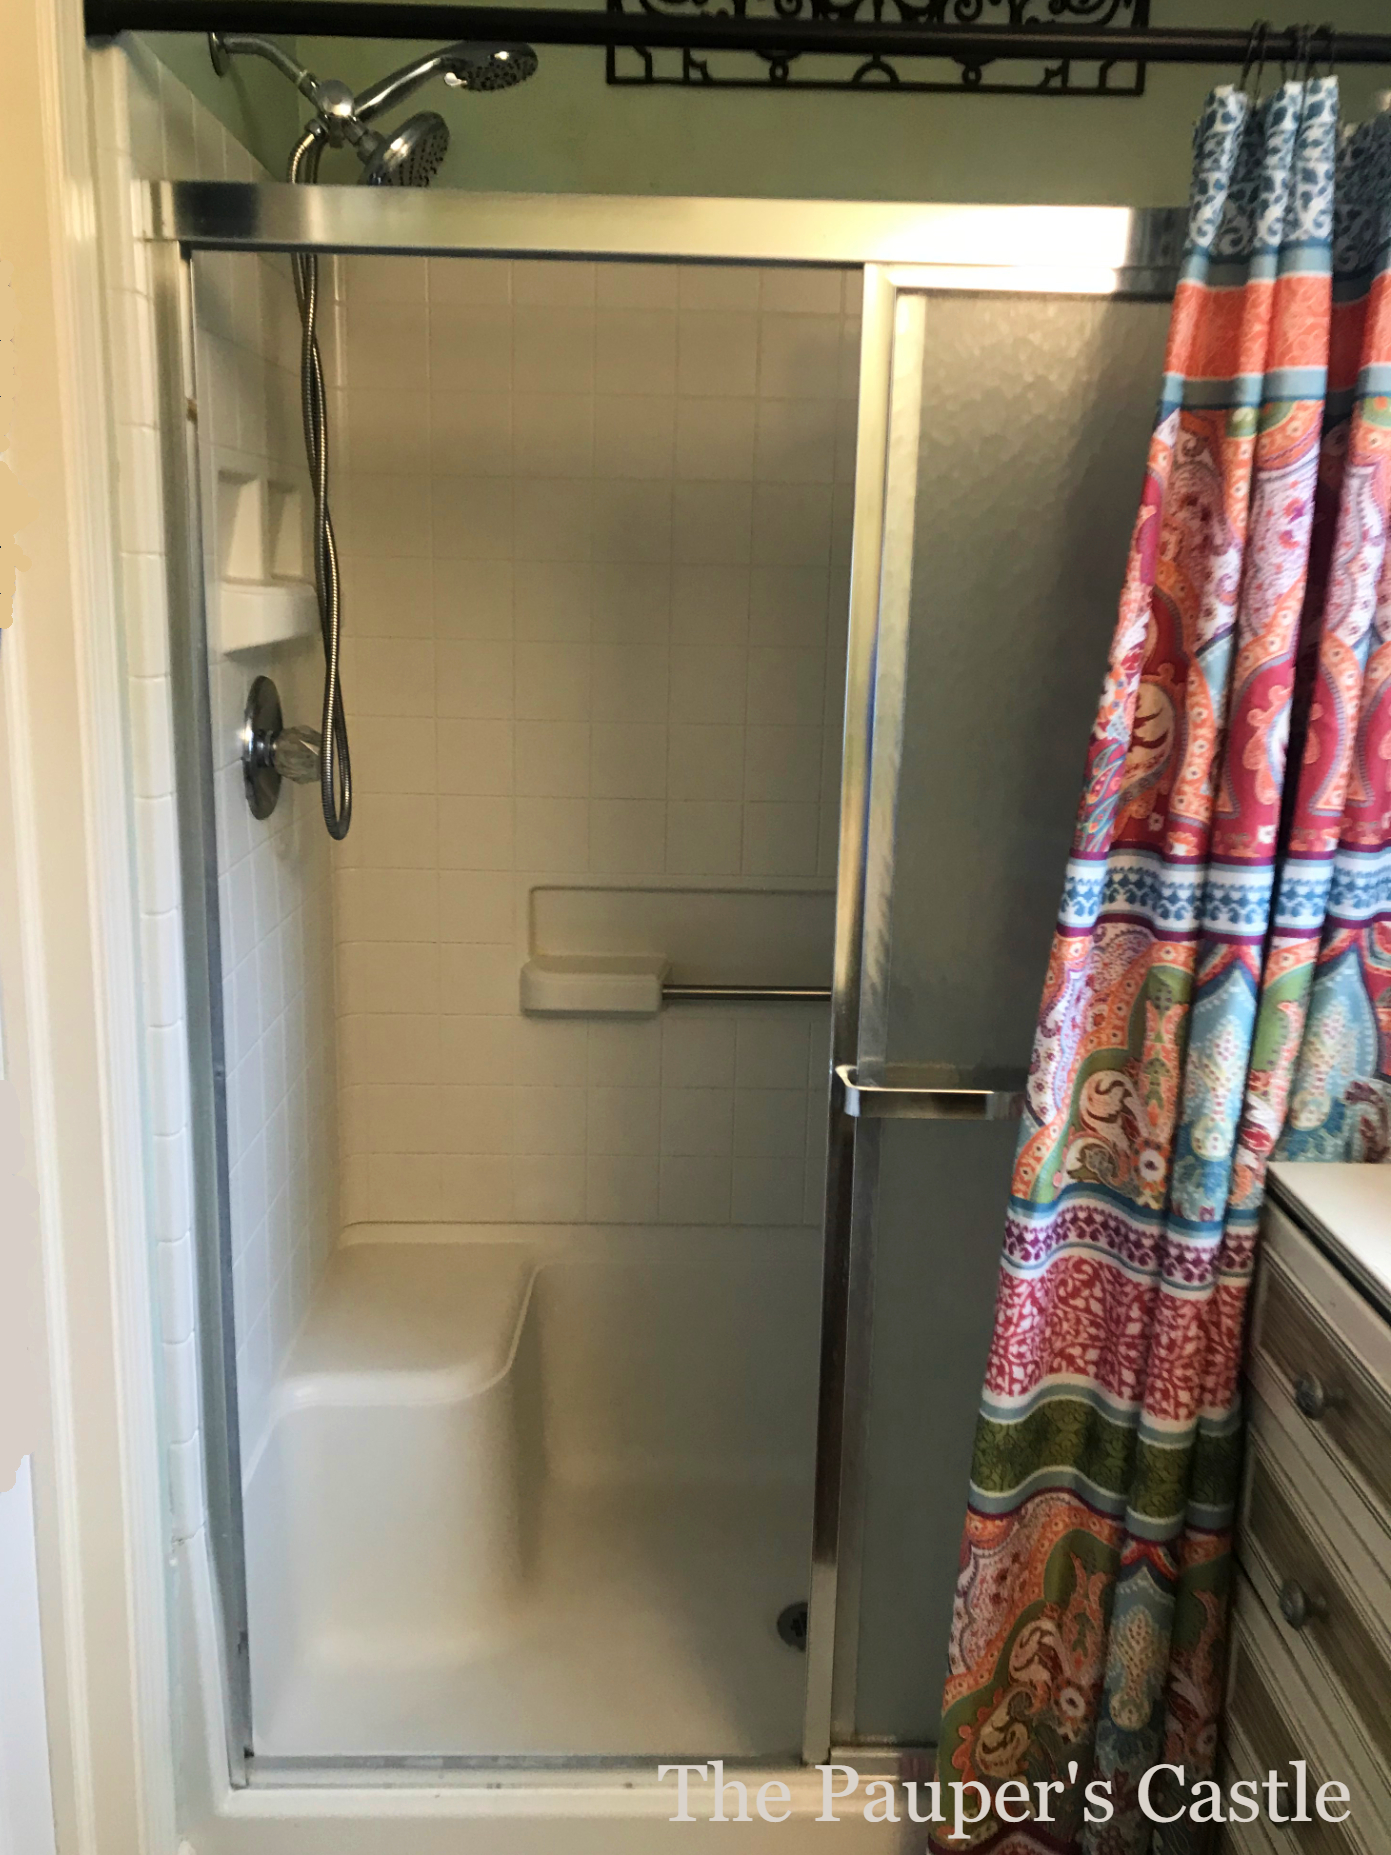 Before
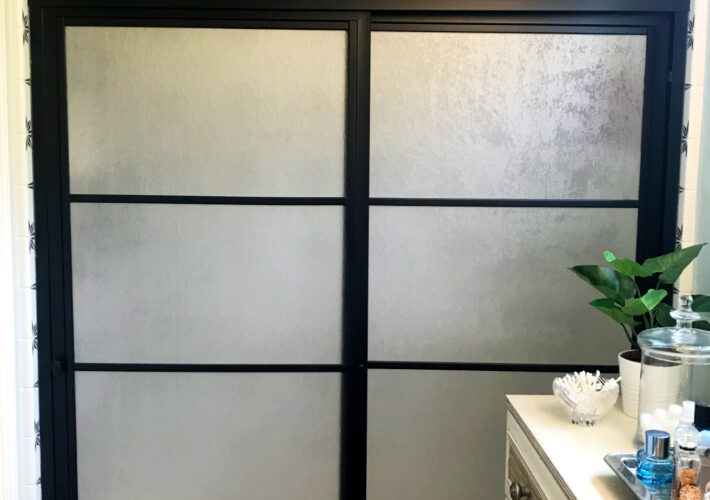
I’ll share how I updated the shower doors in another post. I hated those doors! I searched high and low for something to replace them. Unfortunately, because the shower pan tapered at the bottom, the only option we had was the EXACT same ugly doors or custom doors. I wasn’t about to splurge for custom doors on a fiberglass shower surround. Nor was I willing to spend $300 for new ones to replace them with the same ones I already had. If I could paint the shower, I could paint the doors! I think they look way more impressive now!
On to the rest of the bathroom!


2 COMMENTS
Denise
4 years agoAbsolutely gorgeous!! Truly amazing transformation! You are so patient and determined to spend 2 weekends doing this. WOW. Well done. 🖤
Kellie Beadle
4 years ago AUTHORThank you for your kind words! Well, I’m not sure I’d call it patience or determination. Tearing it out and installing tile, not in the budget right now! Mostly because I think this exceeds our skill set (or at least fear has stopped us). This bathroom NEEDS an upgrade and this was a cost-effective way to start the process. Thanks for taking the time to read!