

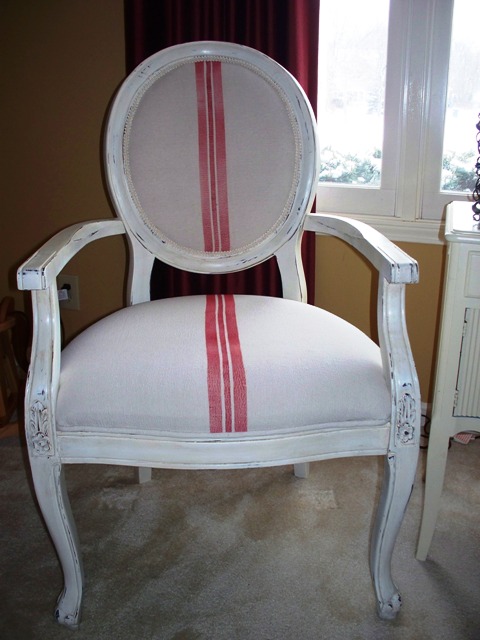
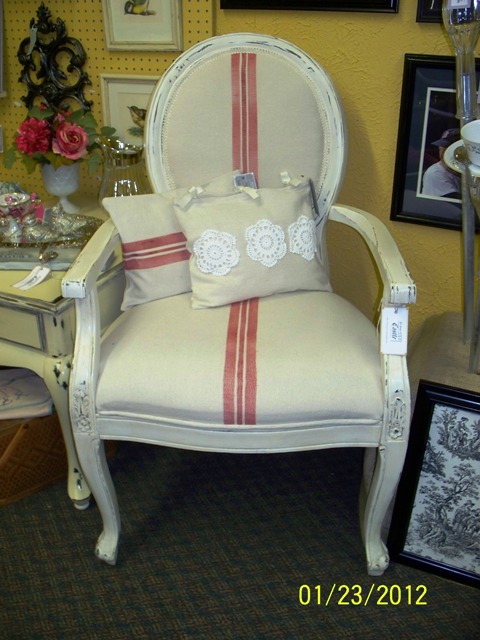
This is a chair I painted in Annie Sloan Chalk Paint (Old White) and then recovered in a “Faux” Grain Sack that I hand painted. I love the look, but if you are like me…they are just too EXPENSIVE. I have never seen one for less than $40.00 here in the Midwest. That is just a bit too salty for me. So I decided to paint one using some acrylic paint, fabric medium and you guessed it… a painter drop cloth. Here is a list of supplies you will need.
Supplies:
- 1 prewashed and dried drop cloth. (no fabric softener)
- Masking Tape
- Painters Tape
- A paint brush, sponge brush, or roller
- Acrylic paint in the color of your choice
- Fabric medium
- Paint palette
- Palette Knife for mixing paint (optional)
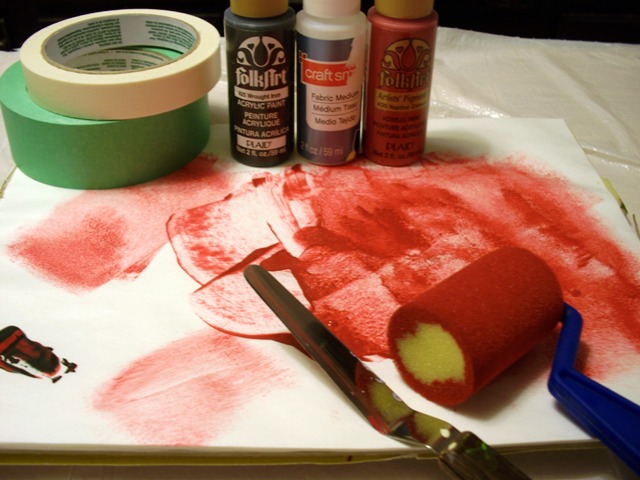 |
| Here you can see the roller I used. I purchased this at Michael’s for $1.99. I think it works better than a brush or sponge brush. The coverage is more even. |
 |
| I used Folk Art Acrylic Paints in Wrought Iron (black) and Napthol Crimson (Red). Any acrylic paint will work just fine. I used Michael’s Brand: Craft Smart fabric medium…I think it was $0.99. Much more cost effective than other name brands. I mixed a little of the Wrought Iron into my red to tone it down just a bit. It was just slightly too red for what I wanted. But again…this is your project, so use what you like. |
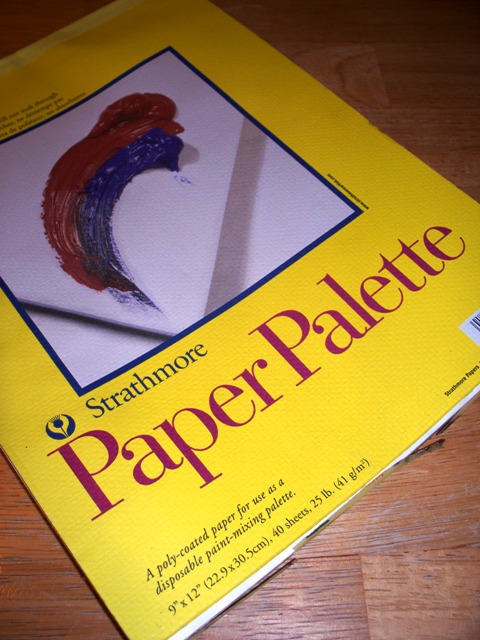 |
| This is the palette paper I used. I LOVE this stuff. If you do a lot of painting like this, it’s worth the investment. I have had mine for probably 8 years…it last a LONG TIME. But foil, wax paper, a plastic bag would all work just fine too! |
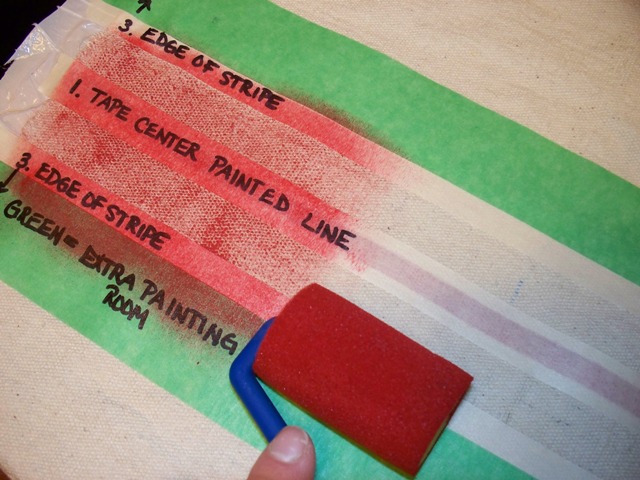
Next you are going to tape off your 1st stripe (you choose the width) using masking tape. I like this over painters tape (we will use this later) because it sticks to the fabric better and less leakage. Simply load your roller and begin rolling over the fabric you want painted. I think a lighter coverage looks more “authentic” than a heavy coverage. But again, the beauty of this project, it’s completely adjustable to your taste!
Once you remove the masking tape (this can be done in about 5 minutes of painting), you are left with one stripe. You can leave it at this or go to the next step
Tape OVER the stripe you just painted. Trying to keep the same amount of masking tape on both sides of the painted stripe. This space will be the space between your already painted stripe and the new ones you will be adding.
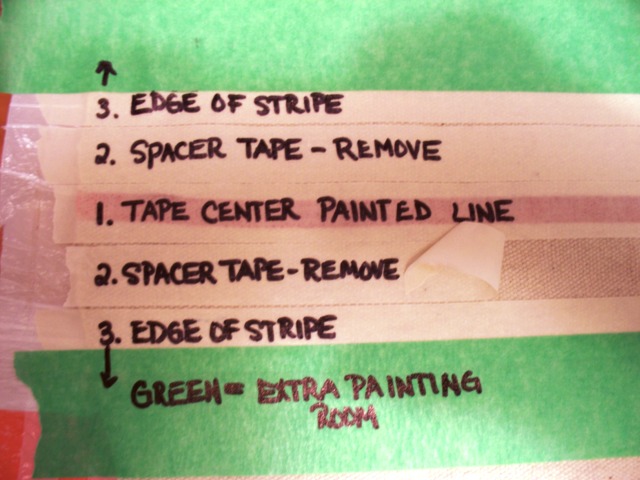
Now, tape a Spacer Tape (2) right next to the center stripe (1). The taped edges should butt right next to one another. Then you will add another piece of masking tape (3) next to your spacer tape (2), again butting the edges together. This piece (3) will become the edge of your new stripe. You will need to do this twice. See picture above.
This is where the painters tape comes in! Add a piece of painters tape to the edge of the #3 pieces of masking tape. This should slightly over lap the outside edge of #3 masking tape. This will give you extra “painting” room so that you don’t get paint on the fabric where you don’t want it. Now go back and remove both #2 pieces of masking tape….this will be where you paint your new stripes.
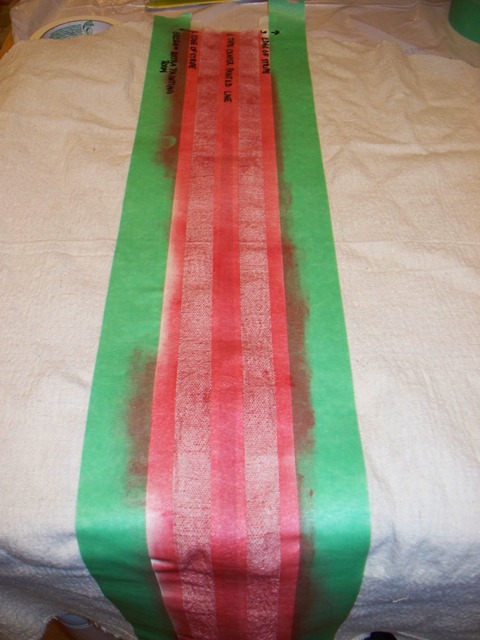 |
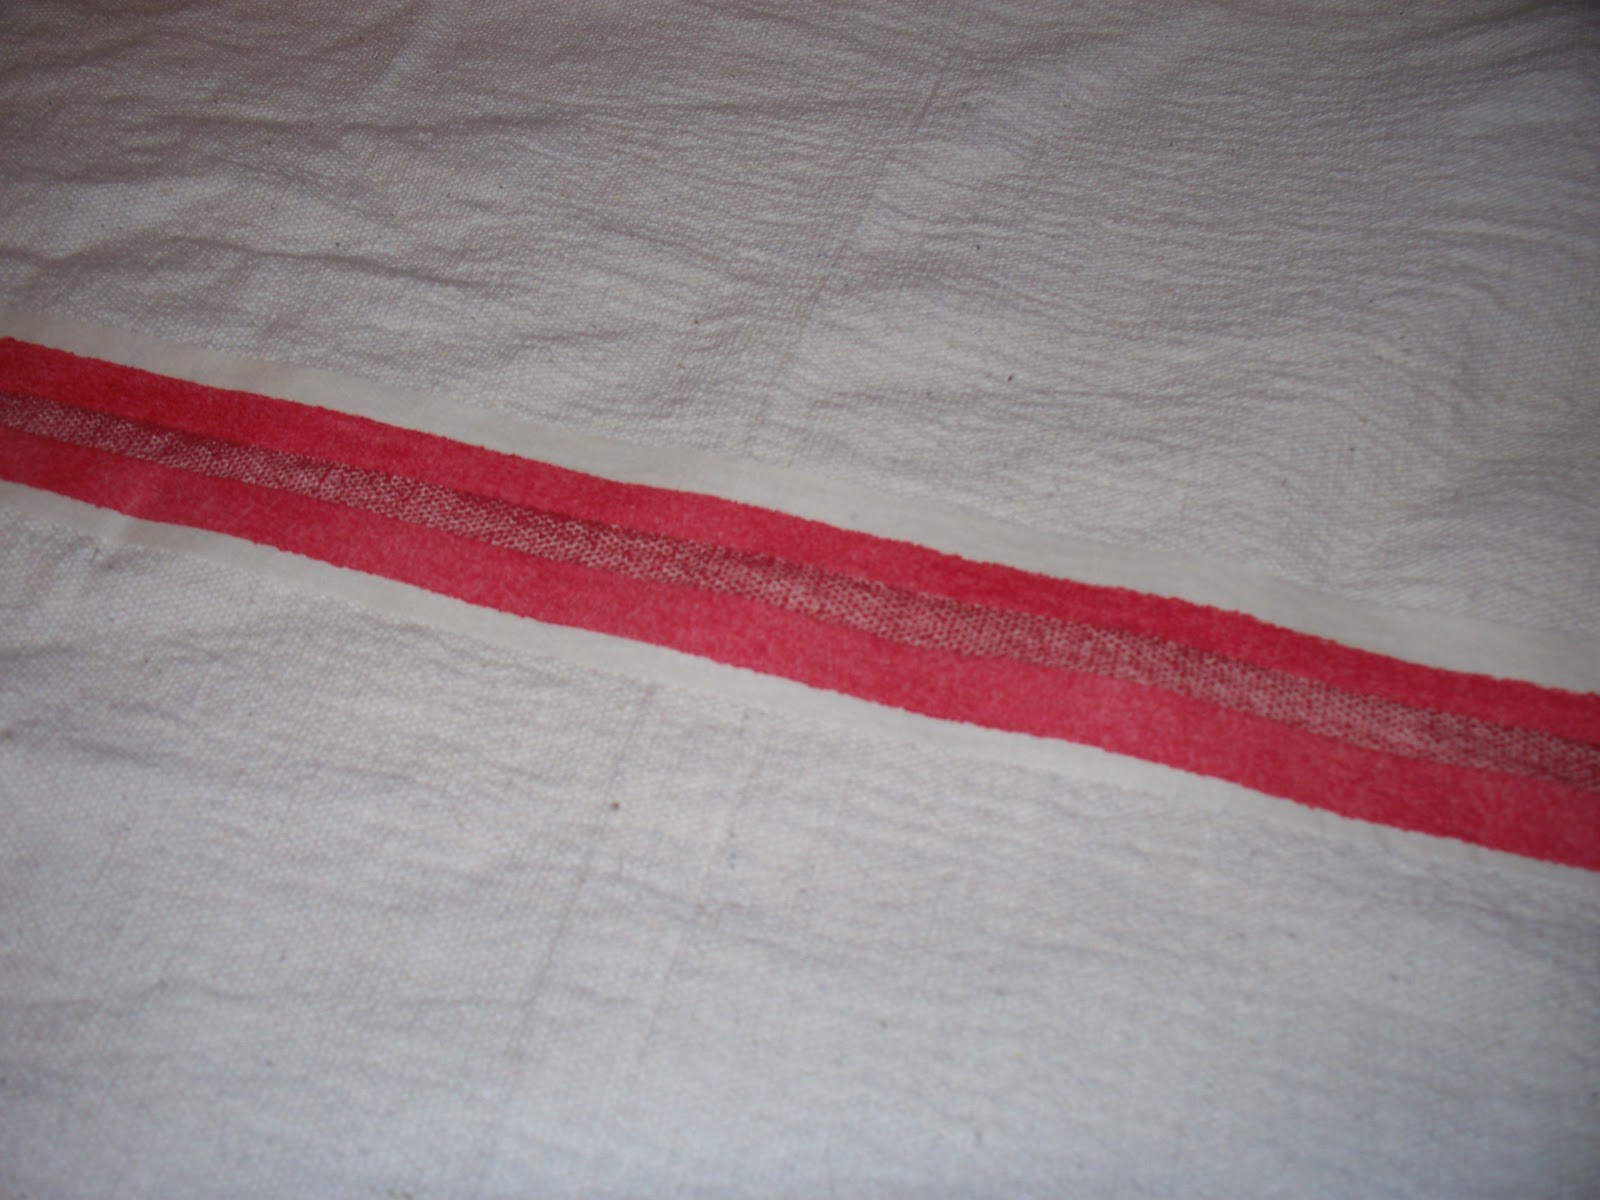
| This is what your painted piece should look like before removing any tape. |
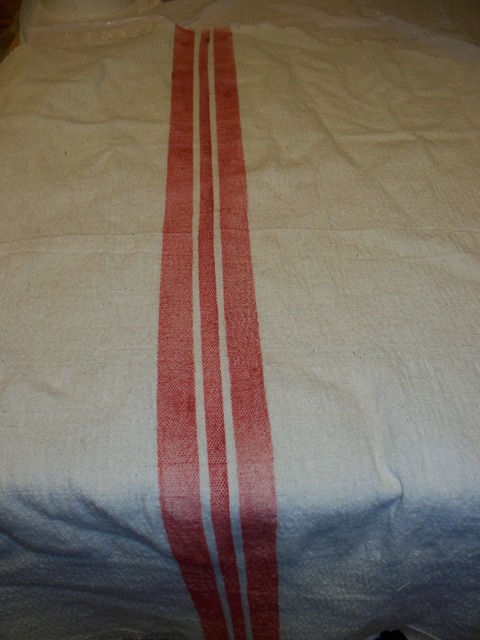
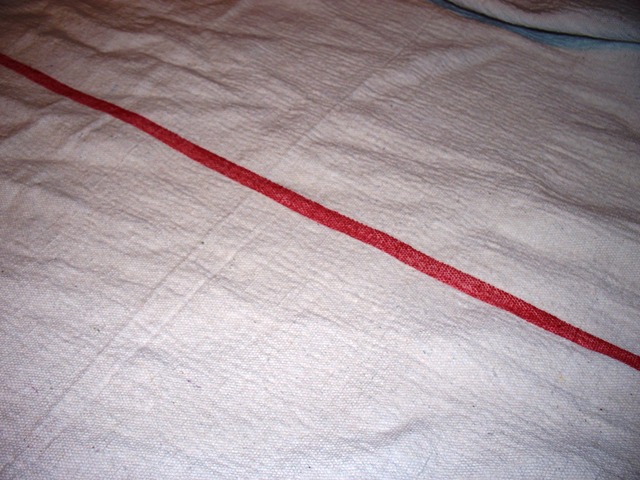
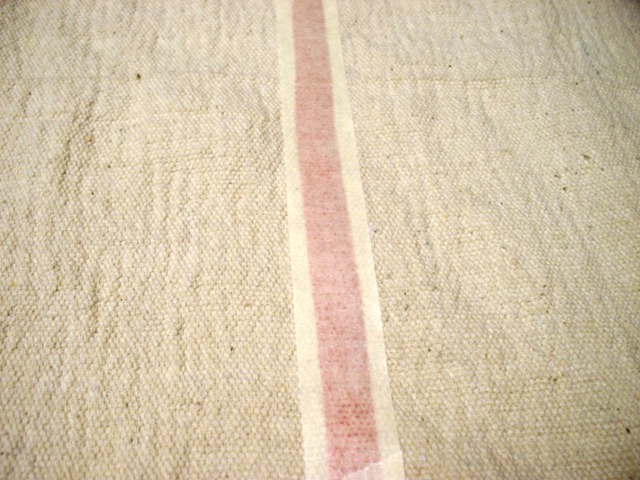
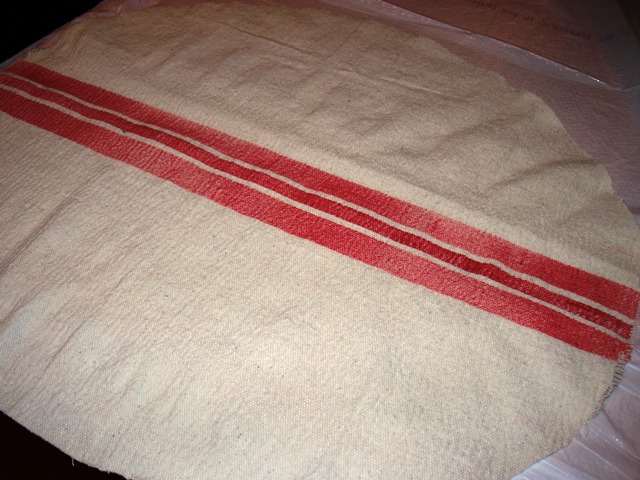
This is the completed “Faux” Grain Sack after all the tape is removed.
Repeat the above process for the number of pieces you need to cover your project! Once your fabric is dry…wait at least one hour, then you will need to “heat” set your fabric with a hot iron. Refer to Fabric Medium directions for this. That’s it…now you are ready to recover your project of choice.
 |
|
| The chair from the front! |
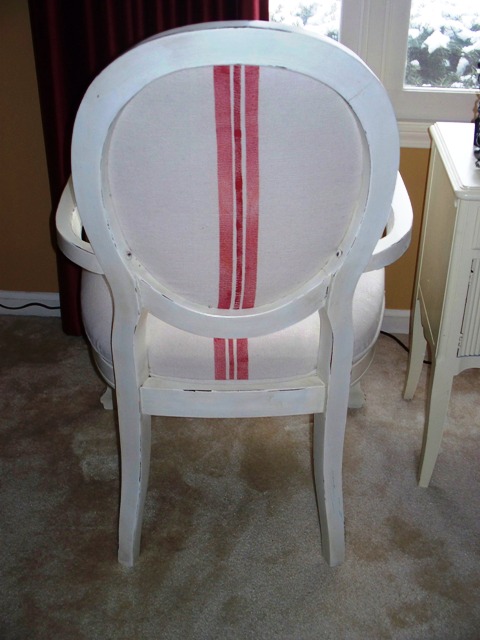 |
| The back of the chair! |

Happy Painting! The possibilities are now endless!
Ciao for now! Kellie
Sharing at:
 |
|
| http://debbie-debbiedoos.blogspot.com/2012/01/repurposed-door-mat-newbie-party.html |
HOME STORIES A 2 Z – I COULD NOT GET HER BUTTON TO WORK 🙁


0 COMMENTS
Rosemary@villabarnes
12 years agoKellie, this is awesome. You need to share it at one of the link parties. More eyes should be on your fab projects.
The Paupers Castle
12 years agoThank Rosemary! You are right…I do need to do more of this. Sometimes…I just run out of time. My new goal! Thanks for your kind comments as always! I love your encouragement! You are truly an inspiration and role model!
Debbiedoo's
12 years agoYou got it girl! I have made drop cloth pillows curtains, painted them, stenciled them and they look good. Your chair IS AWESOME! Thanks for sharing with my newbie party.
Tisha
12 years agoI love the finished project, and your tutorial is very detailed too. I'd love it if you'd share this at my Show & Tell linkup party and giveaway going on now @ the Delectable Home. Thanks for the inspiration!
The Paupers Castle
12 years agoHi Debbie and Tisha! Thank you for your kind comments! Thanks for visiting too! Tisha…I just linked up! Thanks for suggesting!
Samantha
12 years agoSo pretty! I love the color of the red stripes! I am not sure I would trust myself to do this, but you made it look really good! Visiting from MM!
Jen
12 years agoLOVE IT! Great tutorial too! I have been wanting to try that, I think I will now! Came over from BNOTP and following you now!
The Paupers Castle
12 years agoHi Samantha and Jen! Thanks for visiting. I promise to come visit you this week! Good luck on your projects. I hope this helps! It really was very simple!
Shannon@vintagerestyled
12 years agoGreat Tut! I just did a few chairs and I think they need some stripes! Your newest follower.
Stop by: http://vintagerestyled.blogspot.com/
Cindy
12 years agoYour chair is really beautiful now!!!
The Paupers Castle
12 years agoShannon and Cindy! Thank you! Glad you enjoyed the tutorial. Thanks for following. Heading over to visit!